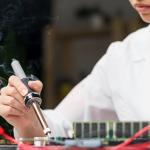

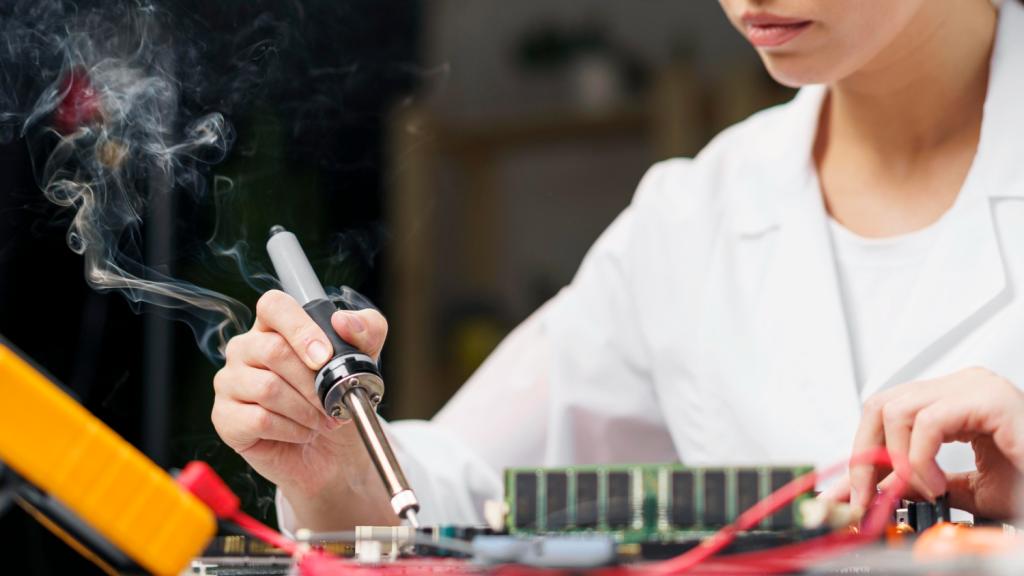
There's a unique magic in watching a collection of lifeless components—resistors, capacitors, and ICs—spring to life as a functional circuit. But what stands between that pile of parts and a blinking LED or a responsive sensor? A tiny, shiny connection. For many makers, soldering is the fundamental skill that turns ideas into reality. Yet, a single bad joint can send you down a frustrating rabbit hole of troubleshooting. Fear not! We're here to demystify the process.
This guide is your ultimate starting point for learning how to solder. Whether you're a student building your first kit, a hobbyist venturing into custom PCBs, or a maker looking to polish your skills, this article breaks down everything you need to know. We'll cover the essential tools, the right techniques, and how to fix those inevitable mistakes.
What You'll Learn:
- How to choose the right soldering iron for your needs and budget.
- The difference between leaded and lead-free solder, and which one to use.
- The essential companion tools that make soldering easier and safer.
- A step-by-step guide to creating perfect, reliable solder joints every time.
- Tips and tricks for desoldering and fixing common mistakes.
Table of contents [Show]
The Heart of Your Workbench: Choosing a Soldering Iron
Your soldering iron is the most critical tool in this process, and not all irons are created equal. While a simple, inexpensive soldering pencil can get the job done for a one-off repair, investing a little more will pay huge dividends in performance and frustration-free making.
- Soldering Pencils: These are the most basic option—they plug directly into the wall and heat up to a fixed temperature. They're cheap but lack the control needed for delicate electronics.
- Soldering Stations: A soldering station is the gold standard for electronics work. It consists of a base unit that allows for precise temperature control and a separate soldering "pen" connected by a flexible cord. This control is crucial because different components and PCBs require different heat levels. A good station heats up fast and maintains a stable temperature.
Our Recommendation: For anyone serious about electronics, a variable temperature soldering station is a non-negotiable investment. A 60W station is a perfect sweet spot, powerful enough for most hobbyist tasks without being overkill.
The Silver Lifeline: Understanding Solder
Solder is the conductive "glue" that holds your circuit together. It’s a metal alloy with a low melting point that, when heated, flows into the joint between a component lead and a PCB pad, solidifying to form a strong electrical and mechanical bond.
There are two main types you'll encounter:
- Leaded Solder (e.g., 63/37 Sn/Pb): This tin/lead alloy has been the standard for decades. It's beloved by hobbyists because it has a lower melting point and is more forgiving to work with, resulting in shiny, reliable joints. However, due to the health risks associated with lead, it has been phased out of commercial production.
- Lead-Free Solder: This is the modern, environmentally-friendly standard. It requires higher temperatures and is a bit trickier to work with, often resulting in duller-looking joints. For beginners, lead-free solder can have a steeper learning curve.
Most solder wire comes with a "flux core." Flux is a chemical cleaning agent that removes oxidation from the metal surfaces as you heat them, allowing the solder to flow and bond properly. It's the secret ingredient for a good connection!

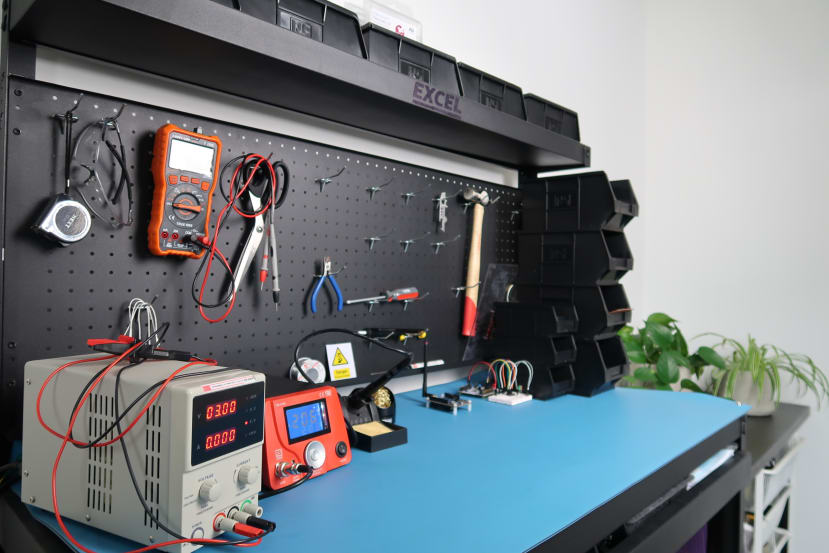
Your Soldering Support Crew: Essential Companion Tools
A great soldering iron is only half the battle. You'll need a few key accessories to make your experience safe, clean, and efficient.
- Soldering Stand: An absolute must for safety. It gives you a place to safely rest your hot iron when not in use. Most soldering stations come with one integrated.
- Tip Cleaner: Keeping your iron's tip clean is vital for good heat transfer. A brass wire sponge is highly recommended over a wet sponge, as it doesn't cause thermal shock to the tip, prolonging its life.
- Helping Hands (Third Hand): This tool, with its alligator clips and magnifying glass, is invaluable for holding your PCB and components steady while you work with the iron and solder.
- Solder Wick (Desoldering Braid): A copper braid used to "soak up" excess solder. Perfect for cleaning up solder bridges between pins.
- Solder Sucker (Desoldering Pump): A small, spring-loaded vacuum pump used to remove larger blobs of molten solder, especially when removing components.
- Safety Glasses: Solder can sometimes splash. Protect your eyes. This is not optional!
- Fume Extractor: Soldering fumes, especially from the flux, are not healthy to breathe. A small desktop fume extractor with a carbon filter is a great addition to your workbench for ventilation.
The Main Event: Step-by-Step Soldering Technique
Ready to melt some metal? Follow these steps for a perfect joint. The core principle is simple: heat the work, not the solder.
- Prepare the Tip: Before you begin, "tin" your iron's tip. Heat the iron to your target temperature (around 320-360°C or 600-680°F for leaded solder) and apply a small amount of solder directly to the tip. It should coat the tip in a thin, shiny layer. This improves heat conduction. Wipe off any excess on your brass sponge.
- Position the Component: Place your component through the holes on the PCB. Bend the leads slightly on the back to hold it in place.
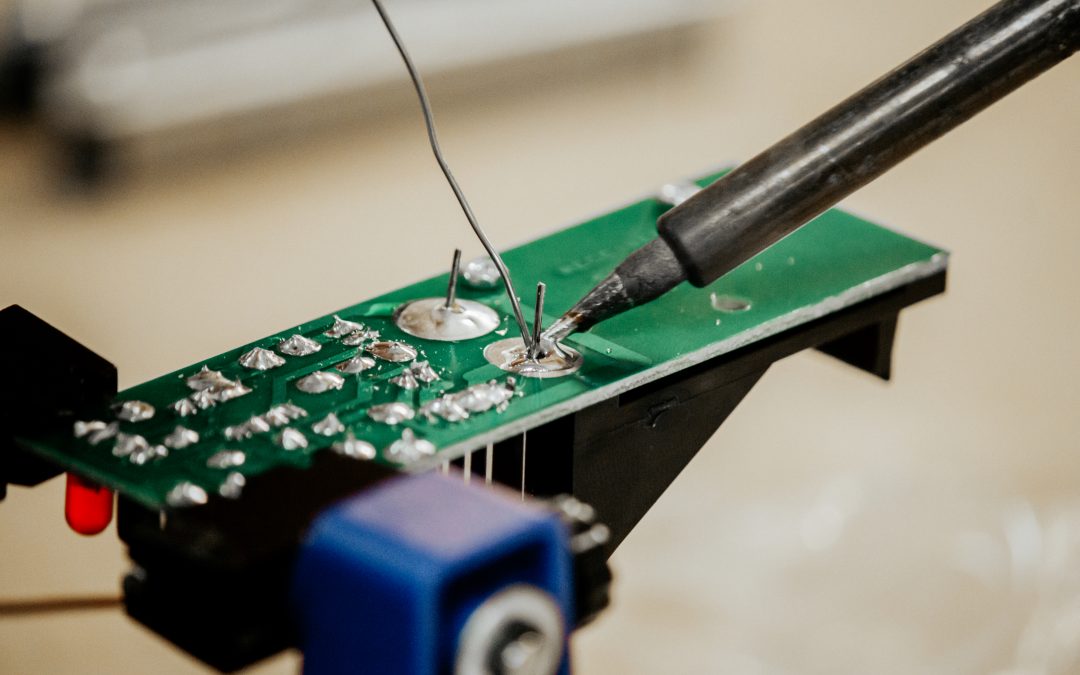
- Heat the Joint: This is the most critical step. Touch your hot soldering iron tip so that it is making contact with both the component lead and the copper pad on the PCB at the same time. Hold it there for 1-2 seconds.
- Apply the Solder: While keeping the iron in place, bring the end of your solder wire to the opposite side of the joint (not touching the iron). The heat from the pad and lead will melt the solder, which will flow smoothly and quickly into the joint, covering it completely. This should only take another 1-2 seconds.
- Remove the Solder, then the Iron: First, pull the solder wire away. Then, a split second later, remove the soldering iron.
- Inspect the Joint: Let the joint cool for a few seconds without moving it. A good solder joint should look like a small, shiny volcano or cone. It should be smooth and cover the entire pad.
Oops! How to Fix Common Soldering Mistakes
Everyone makes mistakes. Here's how to fix the most common ones.
- The Blob (Too Much Solder): If you've applied too much solder, simply heat the joint back up with your iron and use a solder sucker to quickly remove the excess.
- The Cold Joint: If the joint looks dull, lumpy, or balled-up, it means the solder didn't flow properly because the pad/lead wasn't hot enough. To fix it, just reheat the joint until the solder flows again, and add a tiny bit more fresh solder to help the flux do its work.
- The Solder Bridge: This happens when solder accidentally connects two adjacent pads. To fix it, place a piece of solder wick over the bridge and press your hot iron onto the wick. The wick will magically soak up the excess solder, clearing the bridge.
Conclusion
Soldering is a skill that opens up a whole new world of electronics projects. By starting with the right tools—especially a temperature-controlled soldering station—understanding the basics of solder and flux, and mastering the simple "heat the joint" technique, you can create strong, reliable connections with confidence. Practice is key, so don't be afraid to make a few mistakes and learn how to fix them.
Happy making!